I made a decision a couple of days ago. I’m going back to WeightWatchers.
I admit, the last time I went I was a bit baffled by the number of people who go back over and over. Why didn’t they just stick to the plan? Then life kicked me around for a few years, I ended up significantly heavier than when I first went to WW in 2019 and I got an important lesson in how, sometimes, things happen that are out of your control and all you actually can control is how you react to them.
The first time I went I was pleasantly surprised. It was really easy to stick to, I lost weight consistently and hit my target weight in exactly a year. I didn’t even really do any extra exercise. Unfortunately, the week I hit my target weight was also the week we went into lockdown in March 2020! Stress and boredom kicked in, along with lack of activity and relaxing my diet, thinking it would all blow over in a few weeks. How wrong was I? Mobility issues and perimenopause struck, along with COVID, long COVID and ME/CFS, and that was the beginning of my weight gain.
Luckily, my husband gets Vitality Health insurance through his job and they currently offer deals and discounts with 3 different weight loss programs – Second Nature , Boots Online Doctor and WeightWatchers, so support is available to me at reduced rates. I chose WW because I’m familiar with it, I know it can work as well and it is based solely on lifestyle changes. The other two either use GLP-1 injections or offer them as part of the plan. I have no issue with weight loss jabs at all but I can’t afford them to be honest, so I’m going to try without them first. They are also online only whereas, for now at least, there is still a local in-person WW group that I can attend, which will get me out of the house now and again!
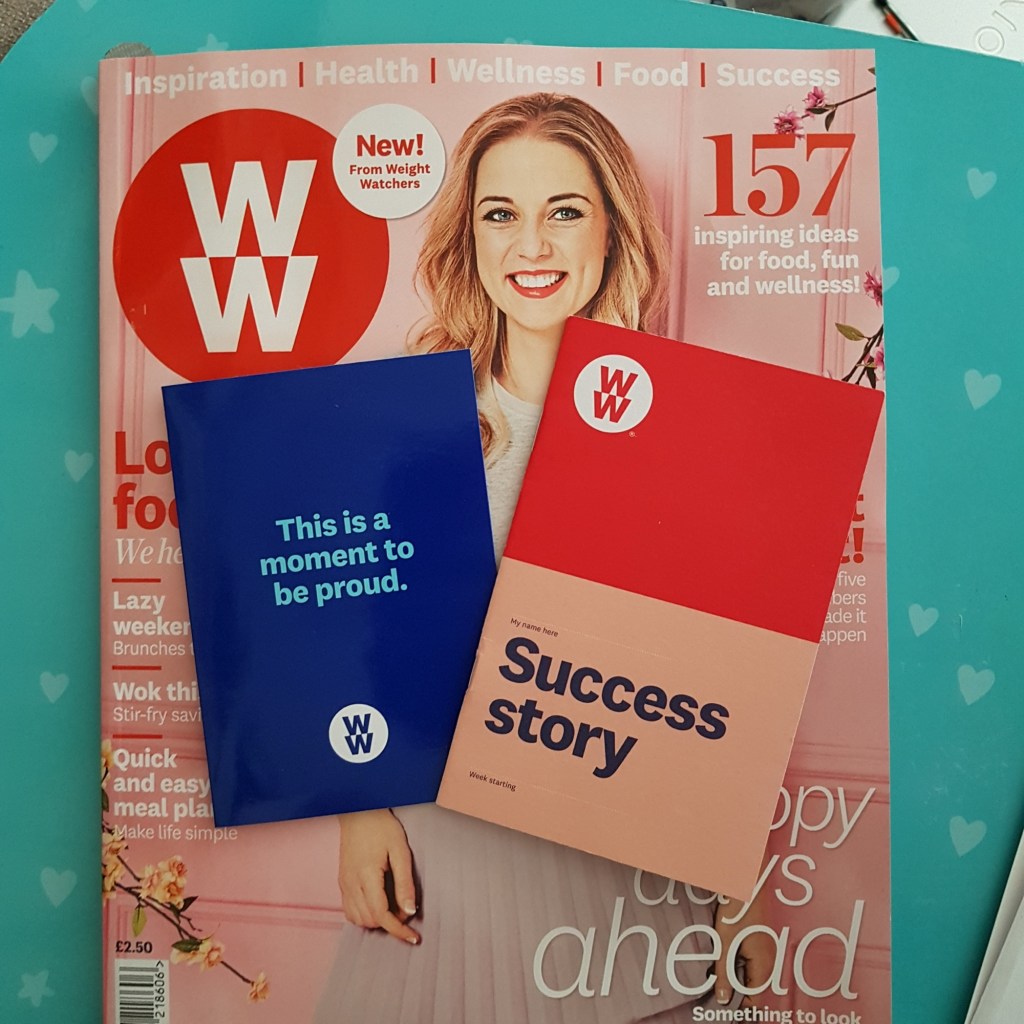
Some goodies from my last time at WW
There have been some changes to WW since I last went so I’ll report back on those next time – watch this space!
When I started this blog, I was really enthusiastic about writing about health and nutrition and finishing my Level 4 Nutrition qualification. Unfortunately, various parts of my body have been conspiring against me and my own health and nutrition has taken a bit of a nosedive. I finally got Covid 3 years after the first lockdown and it wiped me out for months. I already suffered from chronic pain and fatigue due to hypermobile Ehlers Danlos syndrome (hEDS) so, as you can imagine, they were both ramped up several notches and haven’t quite gone back to pre-pandemic level.
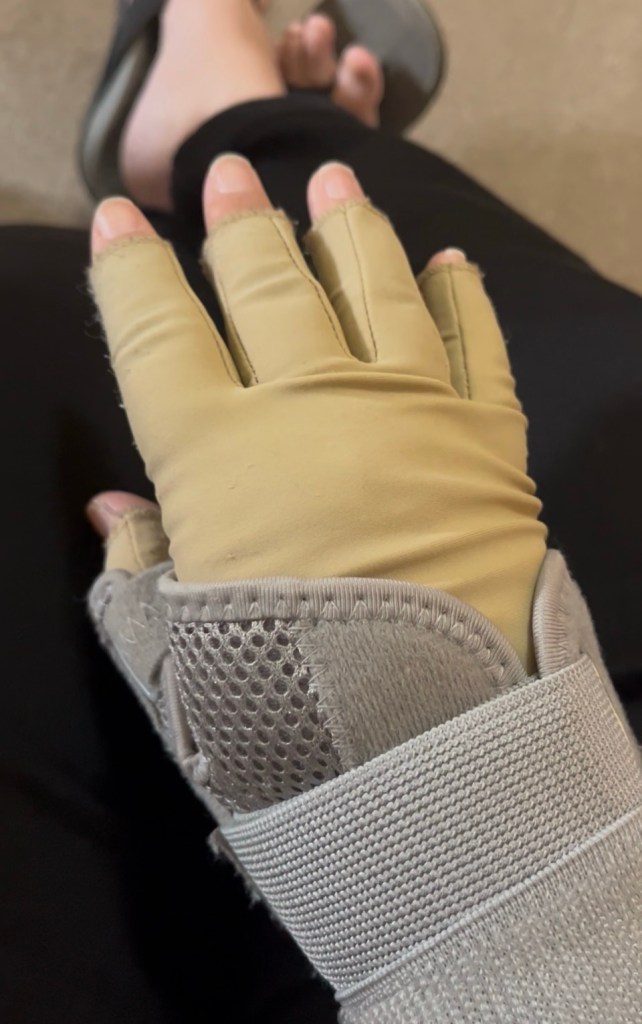
My hand/wrist a couple of days ago. Pretty standard.
On top of that, perimenopause has hit me like a freight train. The pain in my hands and feet was off the scale and, as a result, my activity level dropped off a cliff. Add to that the effect on my IBS and GORD (GERD for the Americans!), leading me to only be able stomach certain foods that aren’t necessarily the healthiest, and my weight has ballooned. I am now significantly fatter than when I thought I was really fat and needed to join WeightWatchers! I know I need to lose weight but it’s so hard when your body doesn’t do what you want or expect it to do.
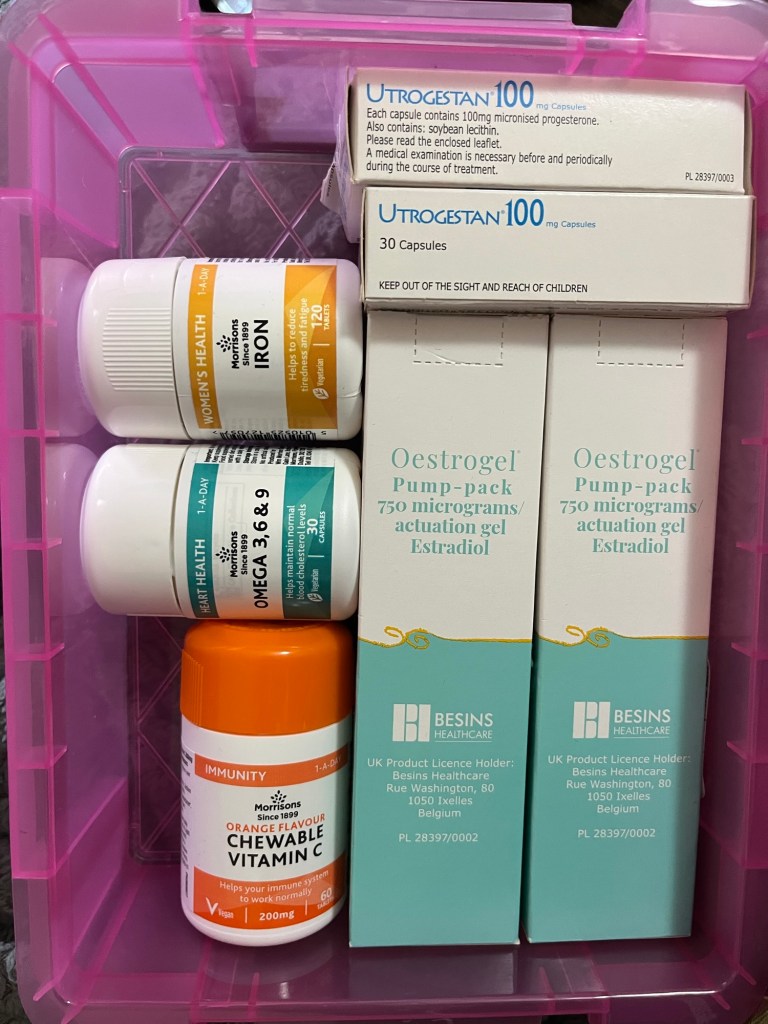
My HRT and some of my supplements. My iron is chronically low and, apparently, my ldl cholesterol is low too.
All has this has made me not want to write about nutrition. I feel like a fraud. I mean, who wants to take nutrition advice from someone who’s so overweight that when they fall out of bed they rock themselves back to sleep? However, I’ve realised that I’m trying. There are lots of people out there who are struggling because the “Calories in, calories out”, “we all have the same 24 hours in a day” gym bros don’t understand middle aged, menopausal, chronically ill women and their advice and judgement is not going to help them. I’m going to talk about my experiences and share any tips I can, and if I never lose a pound, so be it!
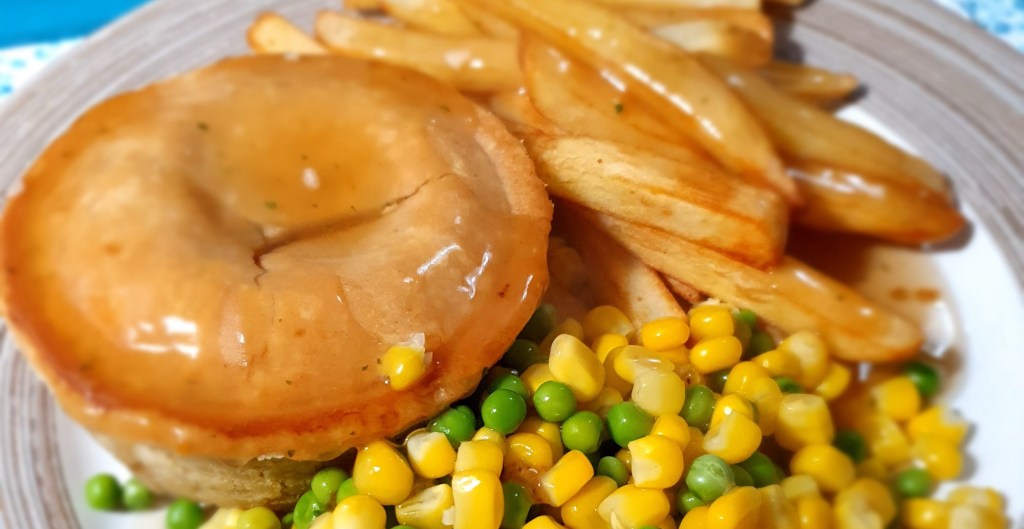
Vegan gluten-free pie, oven chips and frozen vegetables.
Anyone else getting a bit frustrated with the anti-UPF crowd?
Even if you don’t follow the news about health or nutrition you must have heard about UPF (Ultra Processed Food). It’s been everywhere for at least a couple of years now. There have been documentaries, podcasts, books and numerous magazine articles, not to mention the countless social media posts from “experts” with very disparate levels of actual expertise. Therefore, I’m not going to talk about what UPF is. You can find a simple explanation here.
For people who have a basic education about these things, it seems obvious that a diet high in ultra-processed foods is not ideal. In an ideal world, we’d all be cooking nutritious meals from scratch every day. I don’t have any issues with this in theory. I would literally love it if this were achievable for everyone.
However, my problem is that the people who seem to be demonising UPF at every turn, tend to be privileged, middle class, media types who have the means to do this. They are either deliberately ignoring the situations that huge chunks of the rest of the country find themselves in or they are genuinely unaware, which may actually be worse.
In the UK, in 2023/24, 3.12million people used foodbanks. If you’ve ever donated to a foodbank, you’ll know that what they want is non perishable, long-life food items. You might think that’s because these products are logistically easier for the foodbanks to deal with, which they are, but there is another important reason. A report in 2020 found that :-
900,000 people in the UK were living without a fridge (1 in 30 earning under £35,000 a year)
1.9 million people were living without a cooker (1 in 20)
2.8 million people living without a freezer (1 in 10)
When you know these statistics it’s easy to see why lots of people rely on processed/ ultra processed food. People often rant about how cheap and easy it is to batch cook your meals for the week rather than eat ready meals or Pot Noodles but how are supposed to do that if they don’t have a cooker? Where are they supposed to store these meals if they don’t have a fridge or freezer? Your “35p a portion” home-cooked meals cost you 35p because you have a lot of the ingredients in your well-stocked cupboards. If you had to go out and buy all your herbs, spices, sauces, oils etc again, how much would it cost? It’s reminiscent of Terry Pratchett’s “Vimes ‘Boots’ theory of socioeconomic unfairness” and is just not realistic for a LOT of people. When people have hungry kids to feed on next to nothing can you blame them for choosing the 85p 6-pack of crisps that will give them 135 calories over the 99p 6-pack of small apples that will give them about 50? If you really want to improve people’s health you need to help people living in poverty, campaign to reduce food prices, increase access to safe, affordable housing, lower energy prices and all manner of other things that will make it easier for them to eat less UPF and stop blaming them for a “choice” which is often largely out of their control.
I have more to say about UPF but I’ll save that for another day, so until then I’ll leave you with this position statement, made earlier this year by the British Nutrition Foundation on the concept of Ultra Processed Foods :
Our position
A number of countries advise the reduction or avoidance of ‘ultra-processed foods’ (UPF), a category of foods described within the NOVA classification system by the ‘extent’, ‘purpose’ and ‘nature’ of food processing, within national dietary guidelines. This is based on evidence, largely from observational studies, linking high intakes of UPF with poor health outcomes including heart disease, type 2 diabetes, obesity and cancer. Although such studies have shown consistent associations, it is difficult to untangle the impact of less healthy dietary patterns and lifestyles and they do not provide clear evidence of a causal association between processing per se and health. At present in the UK there is no agreed definition for UPF and they are not referred to in government dietary recommendations.
Remember folks, correlation does not equal causation!
I had such high hopes for this year. As I said a couple of posts ago, 2023 was a bit of a write off but I thought I was going into 2024 mostly recovered and ready to claw my health back. Well, “the best laid plans” and all that.
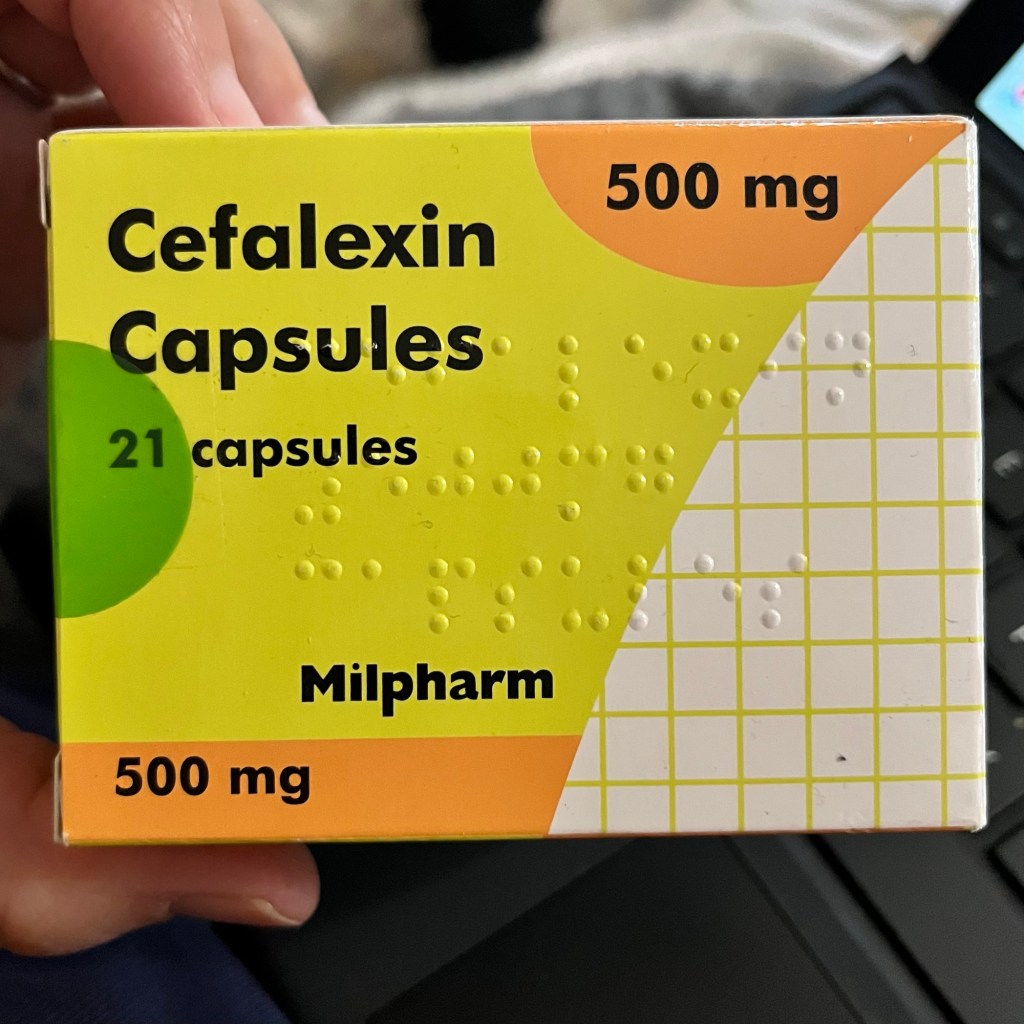
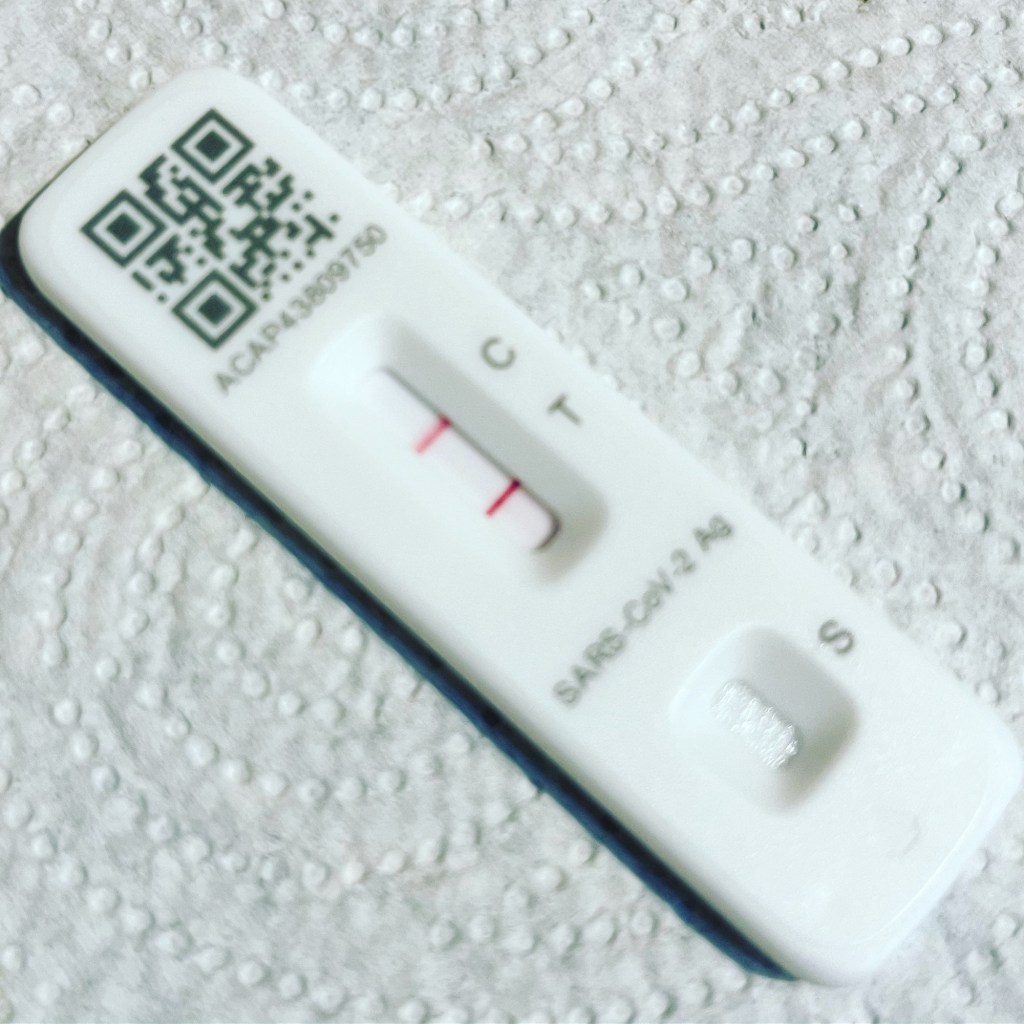
Last Tuesday I finished my lunch and promptly vomited it all back up 🤢 I didn’t really feel much worse than usual, and it was just one episode, so I called my husband and asked him to pick MiniMe up from school just in case, but assumed I’d eaten something that hadn’t agreed with me. I didn’t eat much for the rest of the day. I couldn’t face the delicious curry I’d made for dinner the night before as I still felt queasy, but I managed a bit of tea and toast and didn’t think much more of it. Until I started trying to remember if this had happened before and realised it had, in my early 20s, when I was going through a particularly bad spell of recurrent kidney infections . I only have one kidney, and it a duplex, which makes me more prone to infection. The difficulty is that I also don’t usually get any symptoms other than back pain, and these days I have back pain all the time! Luckily, because of my history, I always have a week’s worth of antibiotics at home and I’d just bought some new urine test strips so I did a quick check. My leukocytes and nitrites, both signs of infection, were positive, so I started the antibiotics that night.
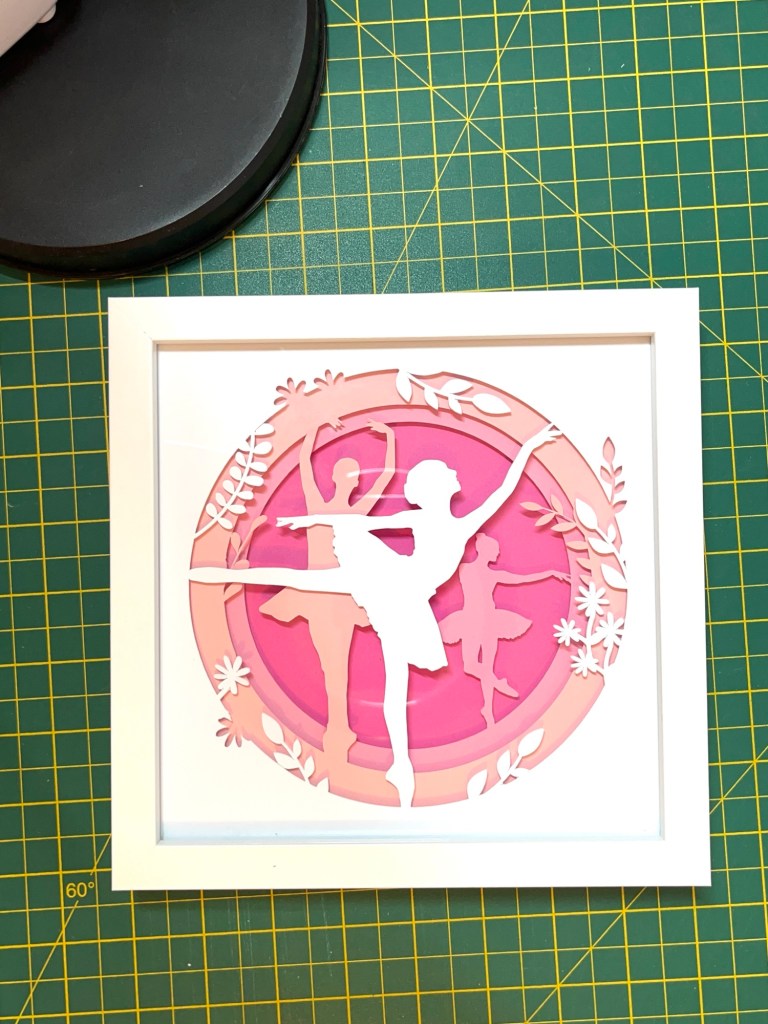
Luckily, within a day or two I felt much better and I’ve been resting lots and drinking lots of water. I look the last capsule a few days ago and have been trying to get a few chores done each day without over doing it. I donated a prize to an event that happened last Friday (I make gift frames and greetings cards),
so I have made a start on making that and am sorting out some of the clutter in the house in the hope of being able to clear enough space to put a mat down in the living room and actually start doing some exercise! Wish me luck!
Well, I’m trying but, as usual, my body has other ideas!
When I’ve lost weight before I did it with WeightWatchers and obsessively tracked every morsel that passed my lips. I don’t recommend WW for a variety of reasons but I do think tracking can be a good idea if you want to lose weight or just improve your diet. Not as a permanent measure but accurately tracking your food for a few weeks can help you understand where your excess calories are coming from or where you might have gaps in your diet that might require changes or supplements.
Anyway, I started tracking last Monday using MyFitnessPal. I really like this app for tracking but the default calorie goal is very low so if you use it – or any other tracking app – please set your own healthy, achievable goals.
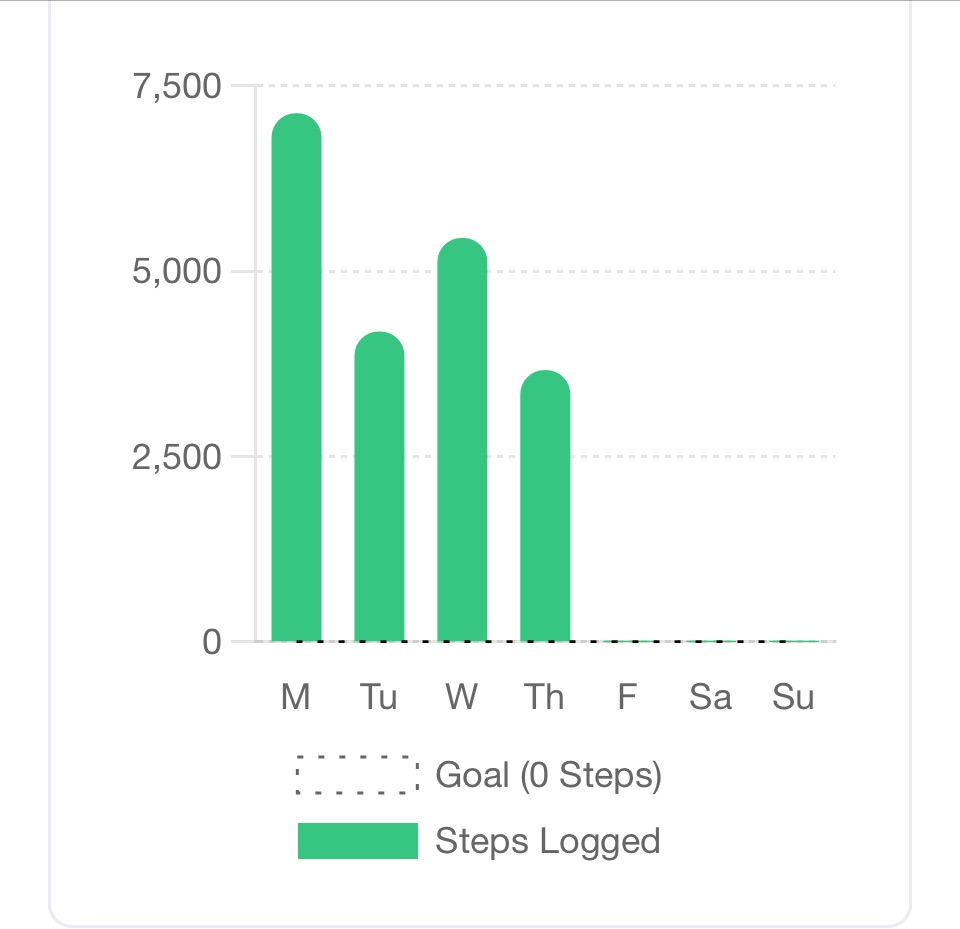
As well as eating healthily I walked my dog every day after I’d dropped my daughter off at school. She can be quite a reluctant walker but she is usually happy to do a lap of the school if it’s not too cold, and there is quite a lot of incline so, even though it’s not a super long walk, it’s quite a good workout for us both (she has recently recovered from a hip injury too).
Unfortunately, my new regime only lasted until Wednesday, when I pulled a hip muscle getting out of my car.
Not 100% accurate but not far off!
It was phenomenally painful and put me out of action for a few days, and also led to me eating chocolate etc to cheer myself up. A couple of bars of chocolate are not the end of the world, but it wasn’t the best start to the year, and I was a bit worried that I was heading for a repeat of last year’s IT band injury. Luckily, after a few days of rest and an Epsom salt bath, my hip feels much better. I managed to walk the dog and take her to agility yesterday, though she is (quite understandably) hibernating today!
Ellie at agility class.
Fingers crossed it’s warmer tomorrow and I can convince her to join me for a lap!
Happy New Year! How are we all doing? Good Christmas? etc….
Right, now that’s out of the way, let’s get down to business. I have never wanted to write a “diet” blog. I want to talk about nutrition and general health issues but I will never preach about weight loss. Whilst I do believe carrying a large amount of “extra” weight can have health implications, if you’re happy as you are, then you crack on. We’re all adults here and are responsible for ourselves and I don’t offer unsolicited advice or make comments about the size of peoples bodies. I’m obviously happy to help anyone who wants to lose weight but I won’t suggest that you should.
However…I am NOT happy with my body and weight at the moment. Since I hit my target weight (another phrase I avoid nowadays!) the week before the first lockdown I have steadily regained all the weight I lost and more, and with a history of heart attack, stroke and Type II diabetes in my family, I think it’s in my best interests to lose a few stone (lbs if you’re in the US, kgs if you’re anywhere else ) and, more importantly, some inches off my waist, so I may talk about MY attempts at weight loss.
2023 was a total write-off for me, healthwise, which has led to me being heavier than ever. I started the year with a ruptured IT band, which is probably the post painful thing I have ever endured ( and I gave birth to a child with 91st percentile head circumference – episiotomy, forceps, stitches- the lot!) I could hardly walk for several months (after the injury, not the birth!) so, obviously, there was very little exercise on the cards.
By May I was pretty much back to normal which, for me, is still quite a lot of pain. I did try to at least do a bit more walking though, and things were going well until mid July, when I got Covid for the first time.
It completely wiped me out for the first couple of weeks. I could barely lift my head up a lot of the time and just about managed to get to the bathroom (about 10ft away). By the end of the summer holidays I was almost back to normal but was still getting tired very, very easily. This meant I had to carry on driving my daughter to school etc as walking would have written off the rest of the day. I was gradually building my strength up though, when I got Covid again in December. Luckily, I wasn’t anywhere near as ill as the first time, but it was still a week and a half stuck at home, followed by the Christmas holidays, when everything goes to pot anyway.
Throw into the mix my dog getting injured and needing months of hydrotherapy, which meant fewer/no walks for us both, no agility class and some missed school visits (we volunteer through the Pets as Therapy Read 2 Dogs scheme),
my daughter picking up more bugs than she ever has before – including Covid again, her also having her first proper allergic reaction since she was 18 months old and three deaths in the family and 2023 was a bit trying to say the least!
So, hopefully, 2024 is going to be different! Obviously, all of 2023’s mishaps were out of my control but my plan for this year is to improve my health. I am going to put my nutrition coaching skills into practice on myself and I’ve signed up to a specialist app for EDS/HSD sufferers to try and improve my strength. I won’t be focussing on losing weight but I am hoping that at least a bit of weight loss happens as a result of the improvements I make to my diet and my increased activity levels. I’m also going to actually post on here a bit more often! My dusty fitness tracker is charging and will be ready to go in the morning. Just hope I am too! 😁
After my blood tests showed I was deficient in vitamin D as well as iron, I decided I’d write a post about it at some point, particularly as it’s been suggested that it can reduce the severity of Covid 19. As it was trending on Twitter a couple of days ago and popped up several times on my Instagram feed I took that as a sign that now was the time!
So..what is vitamin D?
Vitamin D is actually a family of related substances, the most common of which are D2 and D3.
Why do you need it?
It promotes the absorption of calcium and helps regulate the levels of calcium and phosphate in the blood.
It helps to regulate bone growth and repair.
It reduces inflammation.
It modulates processes such as cell growth, neuromuscular and immune function, as well as glucose metabolism.
In short, it’s really important for our bones, teeth and muscles. A deficiency in vitamin D can lead to rickets in children and osteomalacia in adults. Sufficient vitamin D and calcium also help to protect against osteoporosis.
Where do you get itfrom?
Vitamin D is a fat-soluble vitamin and the D3 form occurs naturally in some foods, predominantly fatty, animal-sourced foods.
oily fish – such as salmon, sardines, herring and mackerel
red meat
liver
egg yolks
fortified foods – such as some fat spreads and breakfast cereals
Vitamin D2 occurs in a very small number of sources, mainly in mushrooms that have been grown in UV light, yeast and some fortified foods, so it can be particularly difficult for vegans and vegetarians to get enough purely from their diet.
Luckily, we also produce Vitamin D ourselves when exposed to enough UV light but in the UK, in autumn and winter, we cannot make enough. NHS guidelines state that everyone should consider taking a supplement during these months.
However, there are some groups of people who should take a supplement all year round, including –
people who get outdoors much – e.g, anyone housebound or frail.
anyone in an an institution such as a care home.
anyone who covers most/all of their skin when they’re outside.
Additionally, anyone with dark skin may not make enough Vitamin D and should consider a supplement too.
So, there you go. That’s pretty much everything you need to know and, as it’s pretty grey and windy in most of the UK at the moment, you might want to keep taking your Vitamin D tablets for at least another month or two!
Last July, I tried to give blood. If you have donated blood before (thank you!) you will know that they check your haemoglobin (Hb) beforehand to make sure that taking blood won’t make your Hb drop to below normal levels. For women, they need your level to be 125g/l and for men it needs to be 135g/l. Unfortunately, mine was 110g/l! This is so low I was advised to see my GP and suspended from donating from a whole year. I chatted to the nurse and she did advise me that there were lots of innocuous reasons for my Hb being low, including heavy periods (check!) and diet, particularly eating a vegan or vegetarian diet (check!). On top of this, we were just coming out of a heatwave which meant for the previous few days I’d been living on salad, fruit and ice lollies. I wasn’t overly concerned but I made the appointment with my GP who decided to test me for EVERYTHING! The results came back quickly and showed that I was deficient in both iron and vitamin D, so he prescribed both. I have been looking at my diet to see if I can make some changes, but as both nutrients are hard to get in a vegan diet, I will be taking supplements for the foreseeable future. Whilst I was researching I discovered that iron deficiency is the most common nutritional deficiency in the world, affecting 30% of the population, so I thought it might be helpful to do a short post about iron and why we need it. (Spoiler alert! It’s not just so that we’ll be allowed to give blood!)
Why do we need iron?
Iron is a really important mineral –
It helps the transport of oxygen around the body and it’s transfer between cells.
Vitamin C promotes iron absorption so it is important to eat or drink a source of this vitamin with iron rich meals, e.g, drink a glass of orange juice.
Conversely, tannins (found in tea) significantly inhibit iron absorption, so you should be careful not to drink tea to close to meal times or when you take your supplement.
Hopefully you can use this information to avoid anaemia yourself and I’m crossing my fingers that I’ll be able to give blood again soon!
A friend asked me to write something about eating less meat/being vegan a few of years ago and as it’s Veganuary I thought I’d share ithere.
It’s that time of year again– “New Year, New You” time, where everywhere you look someone seems to be trying to convince you that you need to make a change to your life. Some of these changes are short term, like Dry January, and some are aimed at longer term goals, such as getting you to sign up to a 12-month contract at your local gym – a relationship that will almost certainly be over by Valentine’s Day. One campaign that falls somewhere in the middle, however, is Veganuary , which aims to get people to go vegan for a month but hopes that they will stick with a plant-based diet long-term. The problem with all New Year’s resolutions, though, is that they almost inevitably end in failure and one of the main reasons is that they can just seem so bloomin’ overwhelming! It’s easy to avoid this though, by making small, manageable changes instead of overhauling your entire life in one fell swoop – which is where Meat Free Monday comes in.
As the name suggests, Meat Free Monday is about reducing your meat consumption by having at least one meat free day a week. Why on earth would I want to go meat free, I hear you cry? Well, there are lots of reasons. The obvious answer is animal welfare, but when I say it’s the obvious answer, I mean it’s really obvious so I’m not going to go into that here. So, what are the other reasons?
Well, firstly, it’s better for the planet – in fact, studies have shown that reducing your consumption of animal products is the most effective way to reduce your impact on the environment – far better than ditching your car!
Secondly, it’s better for your health – vegetarian and vegan diets have been proven to lower cholesterol which can, in turn, lower the risk of heart attacks and strokes. A well-planned plant-based diet can also significantly reduce your risk of developing type 2 diabetes.
Finally – it can save you money! You may have heard that eating vegan is more expensive but, while it is certainly true that some meat substitutes can cost more than the cheapest meat version, they often fall somewhere in the middle of the price range. Though you don’t need to eat meat substitutes or any special ingredients at all! For example, you can make a great vegan curry by subbing the meat for a can of green lentils, which costs about 50p, or just use extra beans instead of minced beef for a chilli “non-carne”.
So now you might be wondering if there sre there any convincing reasons not to try going meat-free for one day a week? By far the most common reason I hear is that it’s too hard. That might have been the case in the past, but in the last few years it has become so much easier to eat vegan that it’s not difficult at all! To prove it, here are some ideas for some cheap and easy meals to help you plan a meat free day :
Breakfast
Peanut butter on toast (if you follow a gluten free diet, check your bread ingredients for egg).
Your favourite cereal with plant milk or fruit juice.
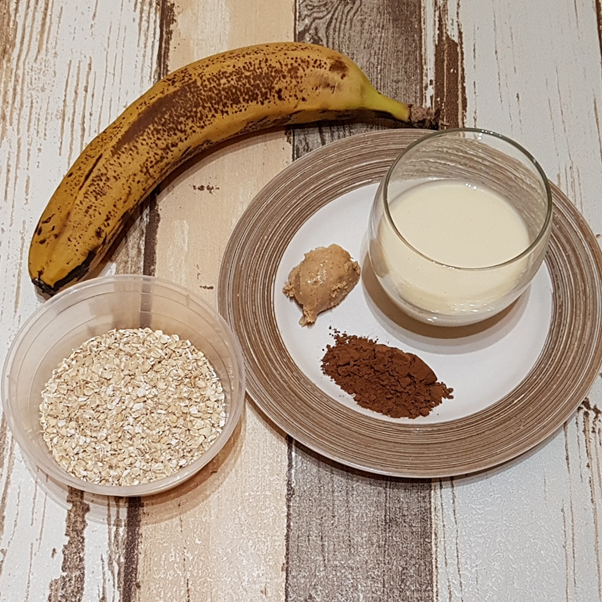
Overnight oats – there are lots of recipes available online, but this is my favourite – it’s like having chocolate pudding for breakfast!
3 tbsp porridge oats (about 30g)
80ml unsweetened soya milk
Half a ripe banana (about 70g)
1tsp cocoa powder
1tsp peanut butter
Place the oats in a bowl, along with the soya milk, cover, and pop the bowl into the fridge overnight
In the morning, add the cocoa powder, peanut butter and banana to the bowl and mash with a fork.
This should be sweet enough but if your banana isn’t ripe you can add a little agave or maple syrup to sweeten. Enjoy!
Lunch
Houmous sandwich with grated carrot, peppers and salad leaves
Jacket potato with vegetable chilli
Chickpea Casserole – this is VERY easy to make! You need
1 can of chickpeas
1 can of ratatouille
Drain and rinse the chickpeas.
Put the chickpeas and ratatouille in a pan and heat through.
That’s it – you’re done!
Dinner
Vegetable fajitas with vegan yoghurt, salsa and guacamole.
Pasta with tomato sauce and vegan meatballs. (Avoid fresh pasta as it usually contains egg).
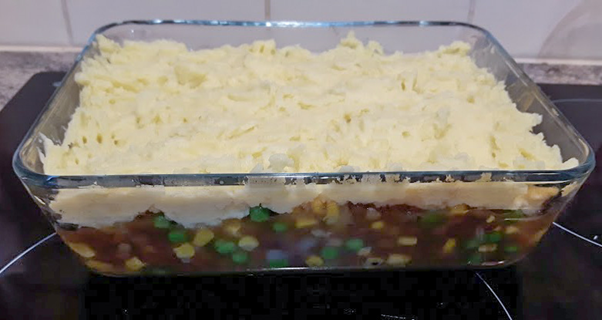
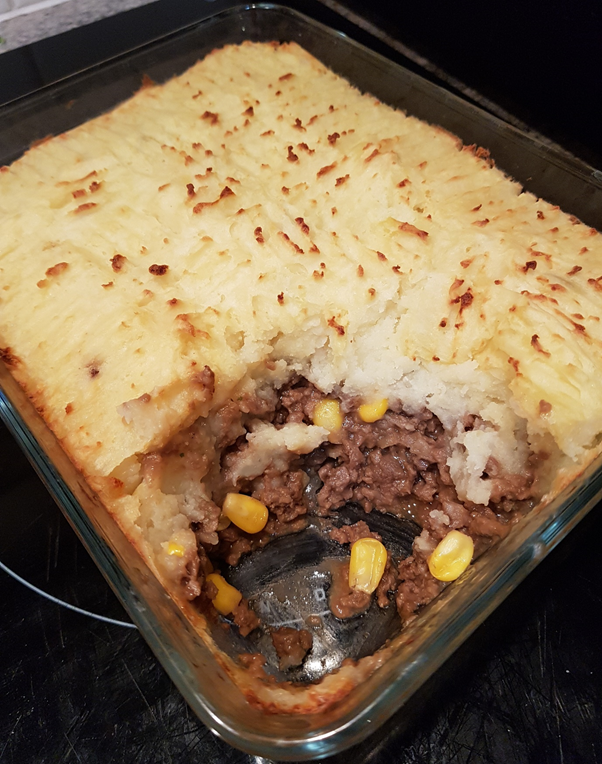
Cottage pie. You can buy a ready made one but it’s easy to make. You’ll need –
1 pack of frozen vegan mince (454g)
1 onion, diced
½ cup frozen peas
½ cup frozen peas
750g peeled chopped potatoes
Instant vegetarian gravy – check the labels in your cupboard before you buy some. Some well known instant gravy brands are already vegan.
1tsp vegetable oil.
100ml soya milk
1 tsp vegan spread
Nutritional yeast (optional)
Salt and pepper.
This will serve 4 and I make mine in an 8” by 6” Pyrex dish.
Pre heat your oven to gas mark 7 / 220° C (200° C for fan ovens)
First, bring the potatoes to boil then reduce heat and leave to simmer.
Whilst they are cooking, heat 1tsp of oil in a large frying pan and sauté the onion over a medium heat for 5 minutes.
Add the mince and cook for another 5 minutes.
Add the peas and sweetcorn and cook for another 2/3 minutes
Make up about 300ml of gravy, following manufacturer’s instructions.
Take mince off the heat and put to one side.
After checking the potatoes are cooked, drain the water and transfer back to the saucepan. Add the soya milk and vegan spread and mash the potatoes until smooth. You can also add the nutritional yeast at this point. It adds a slightly cheesy flavour and is a good vegan source of vitamin B12 but if you don’t want to buy any special vegan ingredients it’s fine to leave it out. Season to taste.
Transfer the mince to the oven dish.
Pour the gravy evenly over the mince and mix with a fork if necessary.
Spread the mash evenly over the top of the mince, ensuring that it reaches the edges of the dish.
Heat the cottage pie in the middle of the oven until the mash browns slightly (if you use a glass dish look for the gravy bubbling).
Hopefully, these suggestions show that it really is a piece of cake to eat vegan for a day, and there are plenty of other ways too. You could add a couple of Quorn or Linda McCartney products to your trolley and not notice a difference in flavour or the price of your weekly shop, and if you want to eat out there is more choice than ever. Starbucks and Costa both have a choice of plant milks for you experiment with, as well as a growing selection of vegan food options. All the major high street restaurant chains have vegan options and many even have entire vegan menus. Veganuary is a great time to try them out too, as there are a lot of special offers around to tempt you through the doors. Even Greggs are getting in on it, by releasing their vegan sausage roll this week in a flurry of publicity*. So, I guess the only question left when it comes to eating less meat is – what’s stopping you?
*Obviously, this is out of date now but Greggs are still releasing new vegan products, and there is more choice in shops and restaurants than ever. I even saw this week that Wagamama are bringing out their version of vegan fish and chips!
*Or several different numbers, as the case may be.
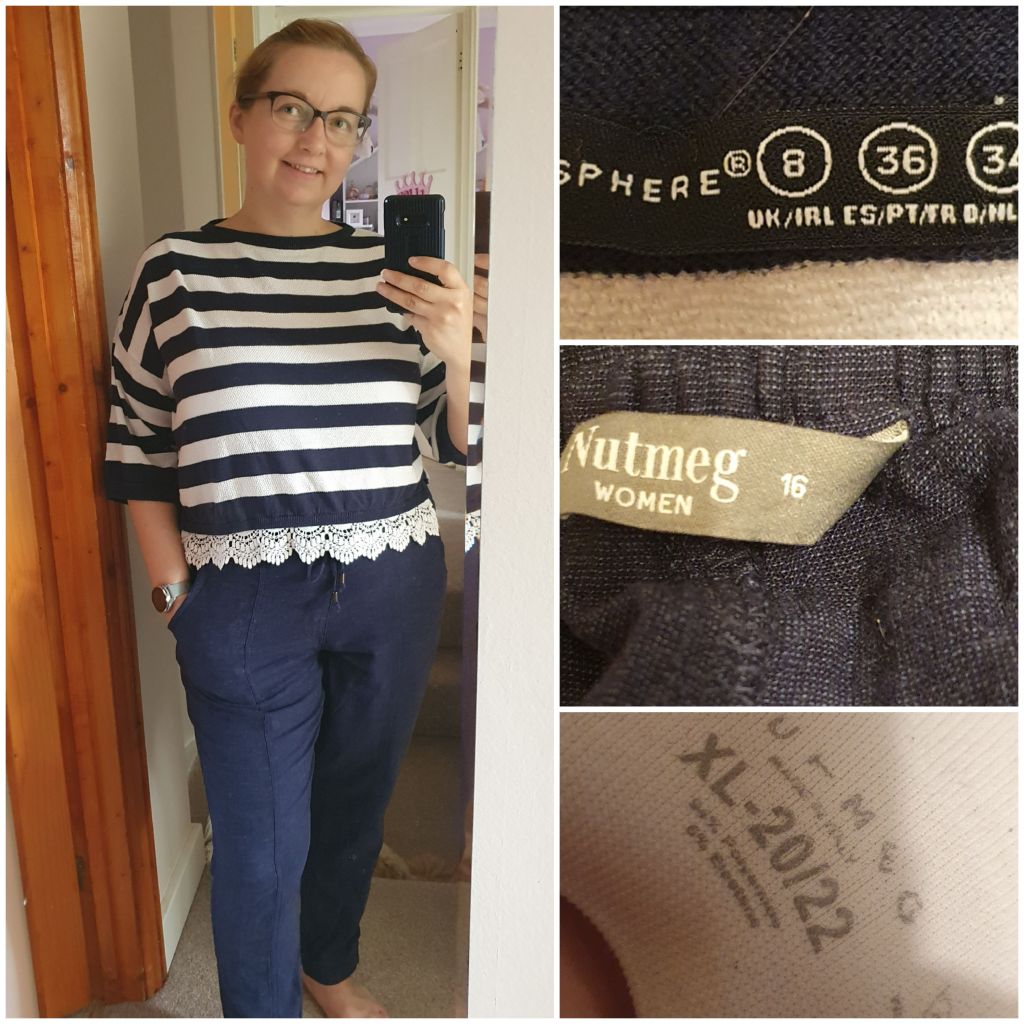
The sun has appeared in the sky today, for the first time in what seems like forever. This is very exciting news! Now, I know we’ve been allowed to go out for a little while now but, to be honest, most days, I haven’t really got anywhere to go. I’m happy pottering about at home most of the time, but not even being able to sit in the garden for most of the month of May has been pretty depressing, even by British standards. So, imagine my delight when Alexa informed me that it was going to be a balmy 17oC today! This did present me with a bit of a dilemma though, as I have *ahem* “outgrown” all of my summer trousers during lockdown and have been wearing stretchy joggers most days. Luckily, I had to pop to Morrisons to pick up some stamps so I grabbed a pair of navy blue linen trousers whilst I was there. When I got home I delved into my wardrobe for a top to go with them and this is where things got interesting (or ridiculous, depending in your point of view).
One outfit, three sizes.
I stood in front of the mirror and realised that the top I was wearing was a size 8 while the trousers I’d just bought were a size 16! A quick check of my crop top/ sports bra revealed that it was a size 20-22! How on Earth could size 22 boobs fit into a size 8 top? Because women’s clothes sizes make no sense, that’s why! When you check the size guide of any given brand (usually available on their websites – good luck finding one instore!) the measurements are given for the bust, waist and hips, so they know what the measurements of the garments are. Why can’t they put them on the labels? We all know which areas of are bodies can cause problems when clothes shopping. For me, it’s my waist as I put all my weight on round my middle. My life would be so much easier if I could reliably shop for jeans by waist size. My husband can. He can go online, filter by waist and inside leg and know that when the jeans arrive, they will fit him perfectly – regardless of where he buys them from. Why are women still put through the ordeal of taking off their perfectly fitting size 12 jeans to try on a different pair of size 12 jeans, only to find they can’t do them up? How difficult can it possibly be to put the measurements on the labels and let us make an informed decision instead of playing the shopping equivalent of Russian roulette every time we need to buy something? No wonder women spend so much longer trying on clothes than men! We have so much less information to go on!
If you find yourself worrying about the numbers on the labels inside your clothes, my advice to you is to just cut them out. Buy clothes that make you feel good and get rid of number that makes you feel bad. Or you could do what I do, and make some of your own clothes – no labels required! If you are trying to get fit or lose weight, I’m not saying you should stop. There are other far more important numbers to worry about though- how many flights of stairs can I manage now? How long did I manage to exercise for today? How many of my five-a-day did I eat? Try and improve those numbers and your health will improve too. By all means, keep track of your waist size if you want to. Waist size is an important indicator of potential risks to your health, after all. Just make sure you use a tape measure and not some arbitrary sizing system that varies wildly from retailer to retailer. Your self-esteem will thank you for it.