baking, Cakes, plant based, vegan

Never make a birthday cake in a heatwave!

It was my husband’s 40th birthday last week so I said I’d make him a cake. I wasn’t anticipating the relentless heatwave we’ve been having here in the UK so it all went a bit wrong. After a minor breakdown, I managed to rescue it and posted pics of the finished product online where it got 1000+ likes and loads of requests for the recipe, so here it is! To be honest, in keeping with my other “recipes” , it’s really just assembly instructions as I do everything the easy way. There is a bit of baking involved though – that’s unavoidable, I’m afraid!

Top tip!

You will probably need to start baking this a couple of days before you want to eat it!

Step one :

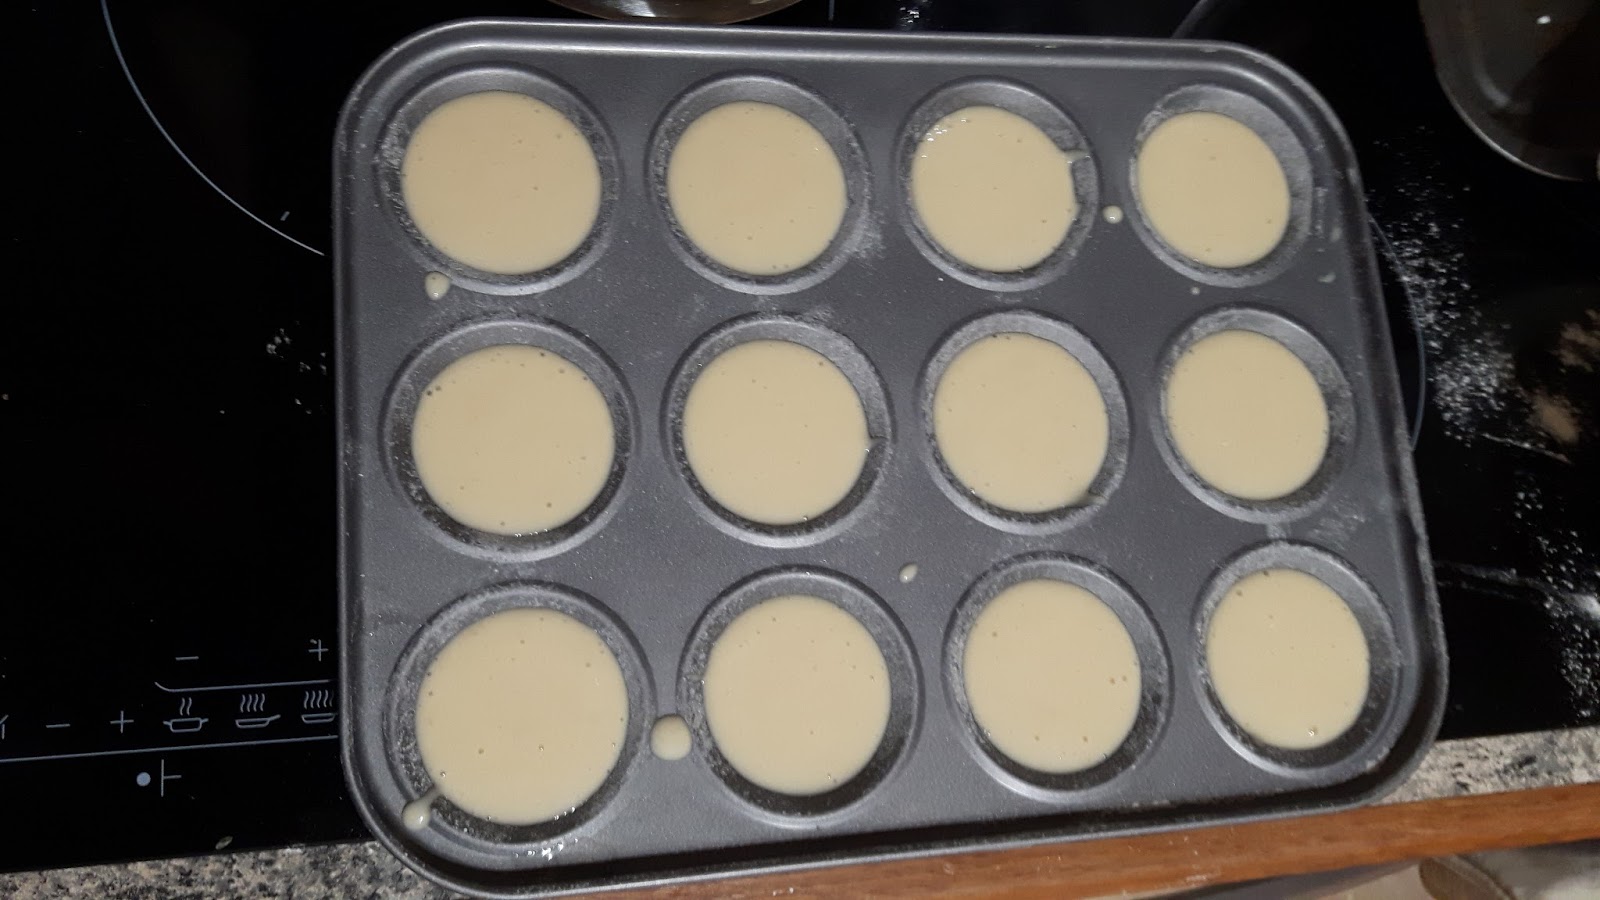
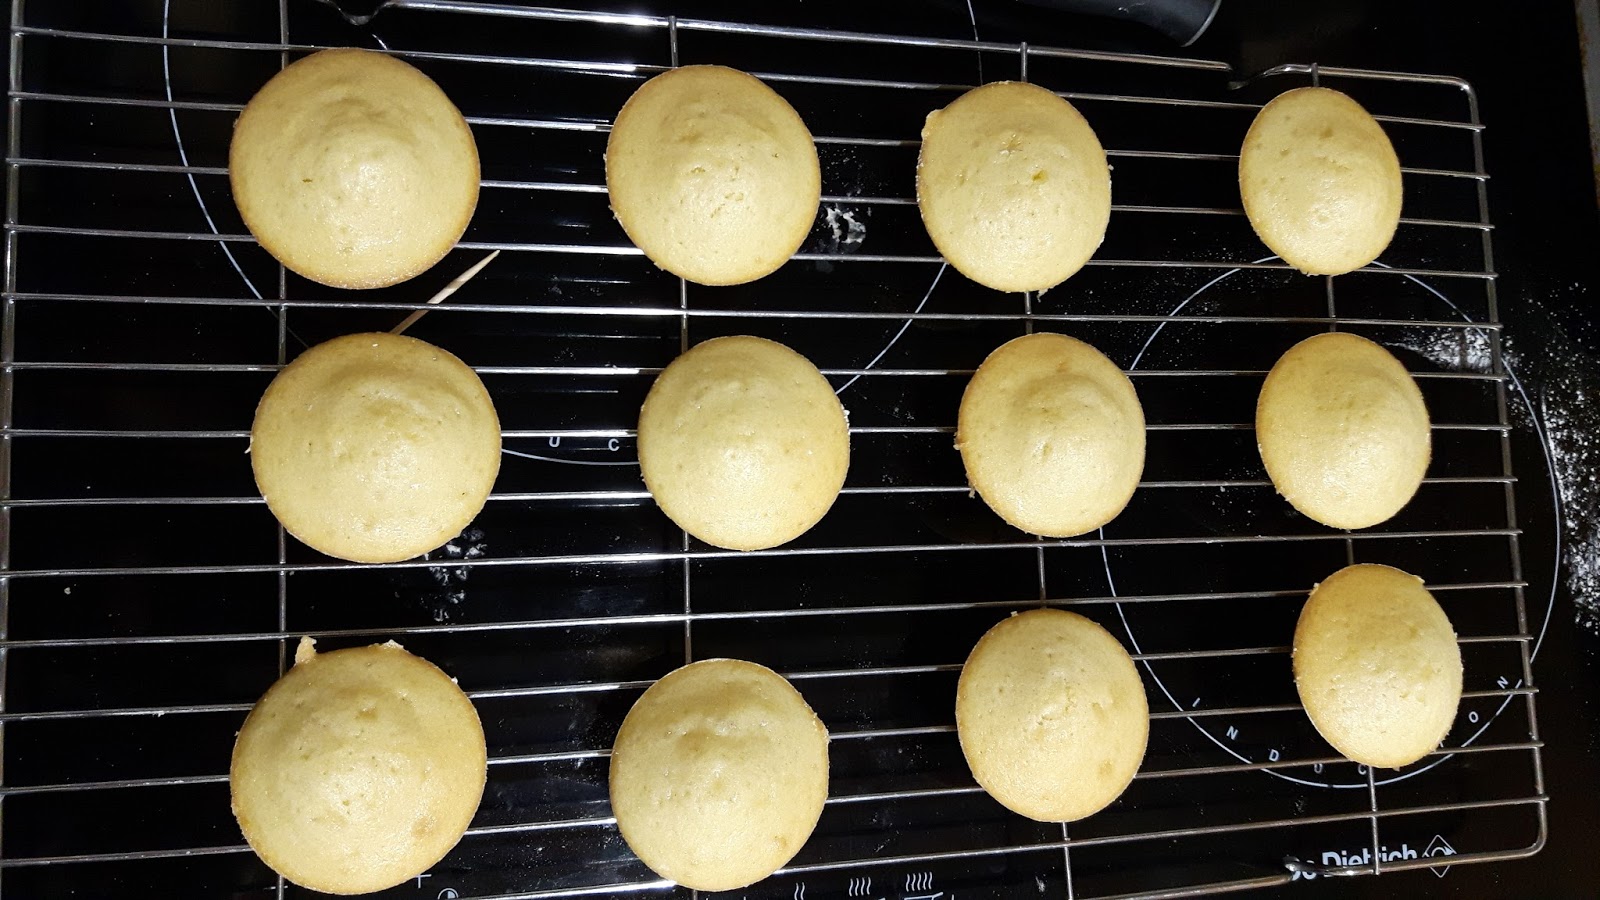
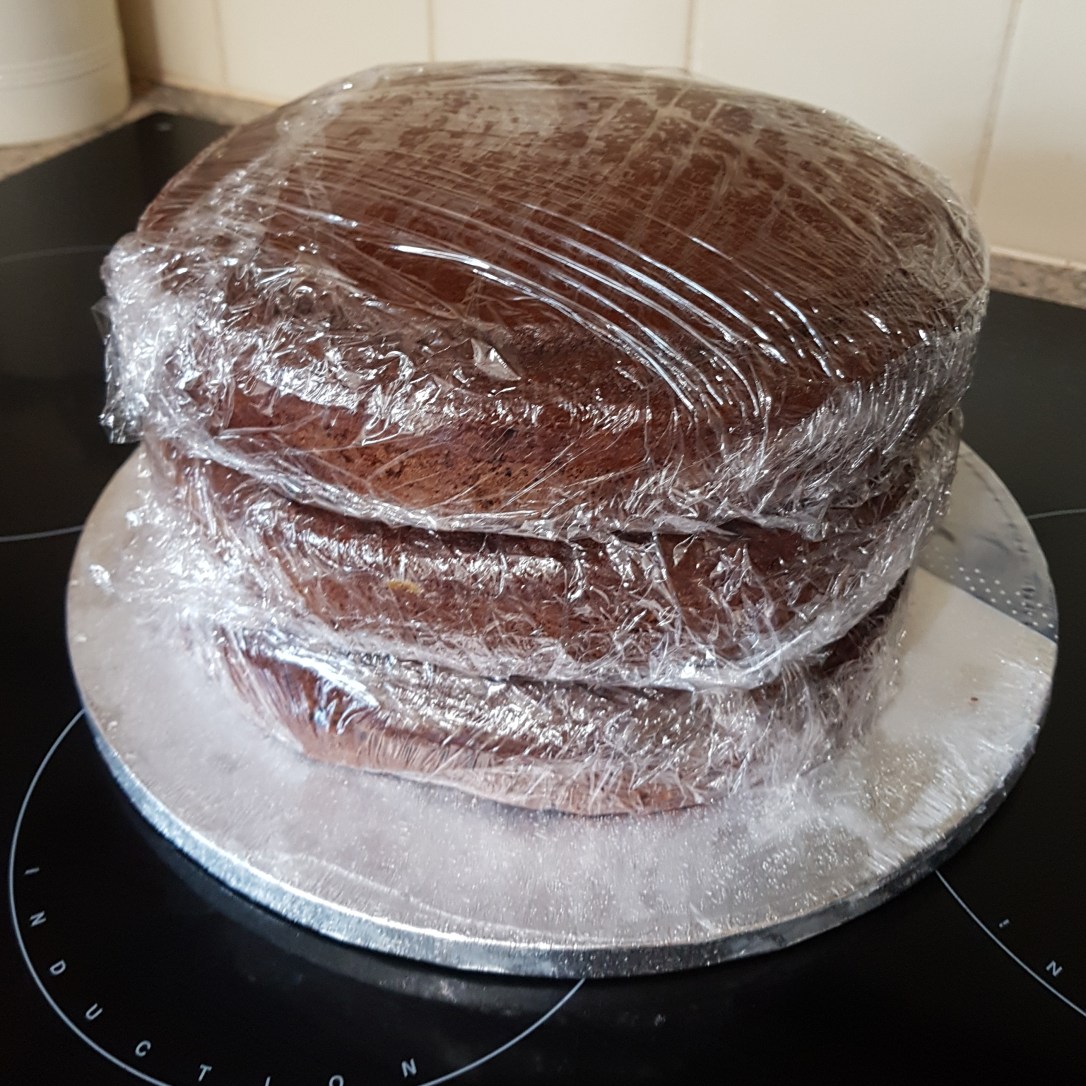
Bake the cakes! I used this recipe but you can use your own. Instead of splitting this recipe between two 8″ cake tins, I put it all in to one 9″ inch tin and baked for about 35 mins (until a skewer comes out clean). For this cake I made 3 layers – which makes for a big cake! From here on I will refer to the quantities I used for this 3 layer, 9″ cake, which can be adjusted for your particular requirements. After the cakes have cooled on a rack, wrap them individually in cling film and refrigerate. I left mine in the fridge overnight.

Step two:

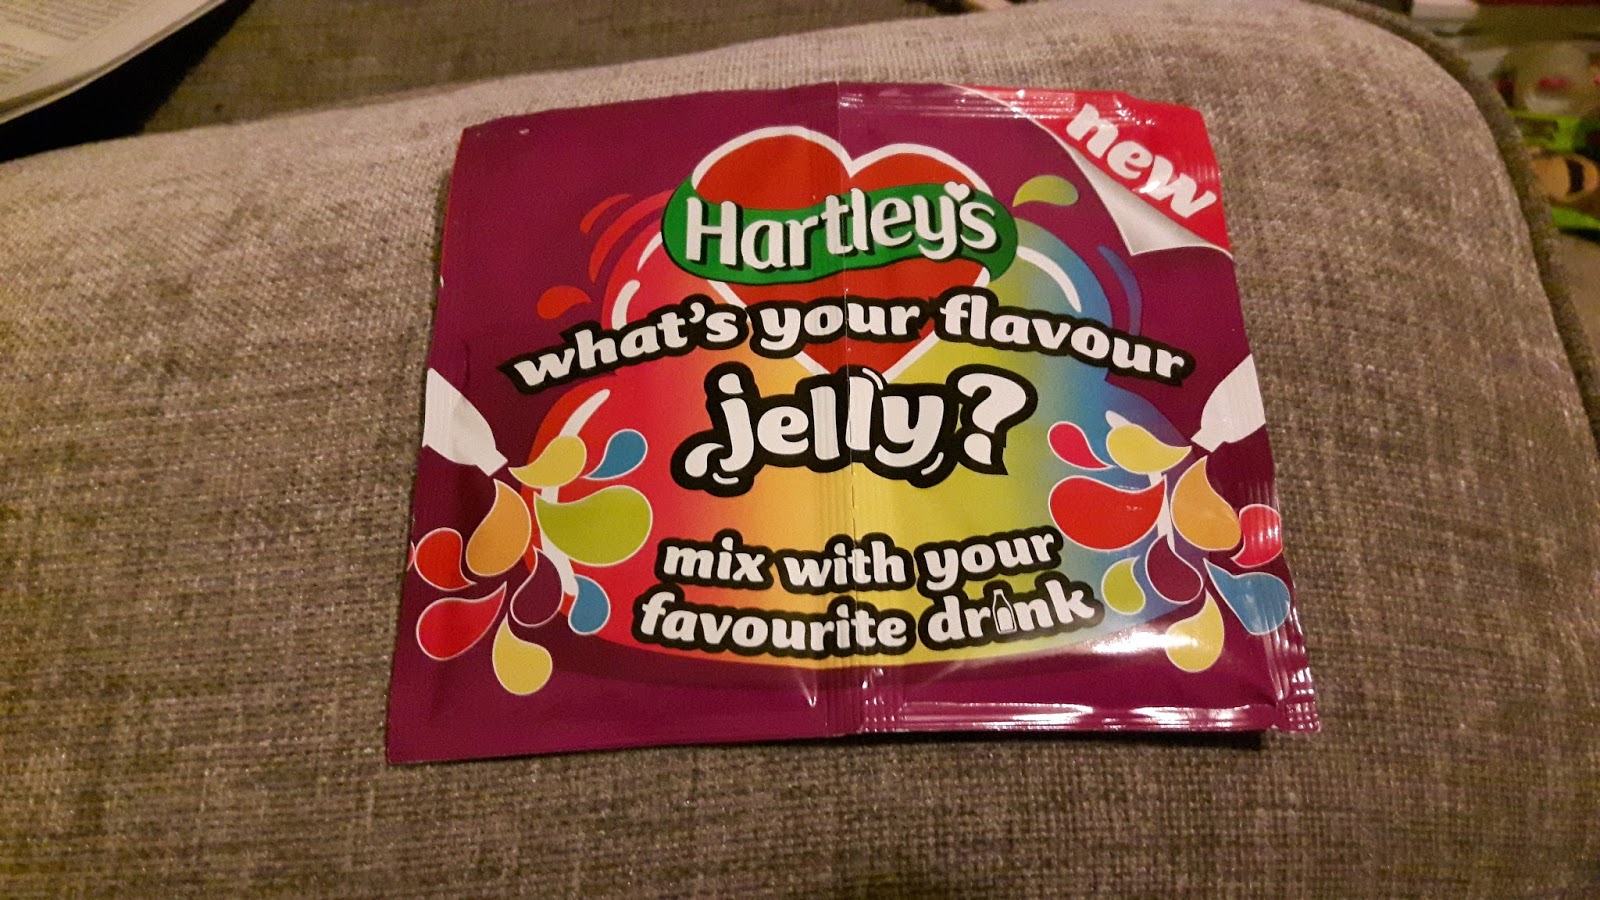
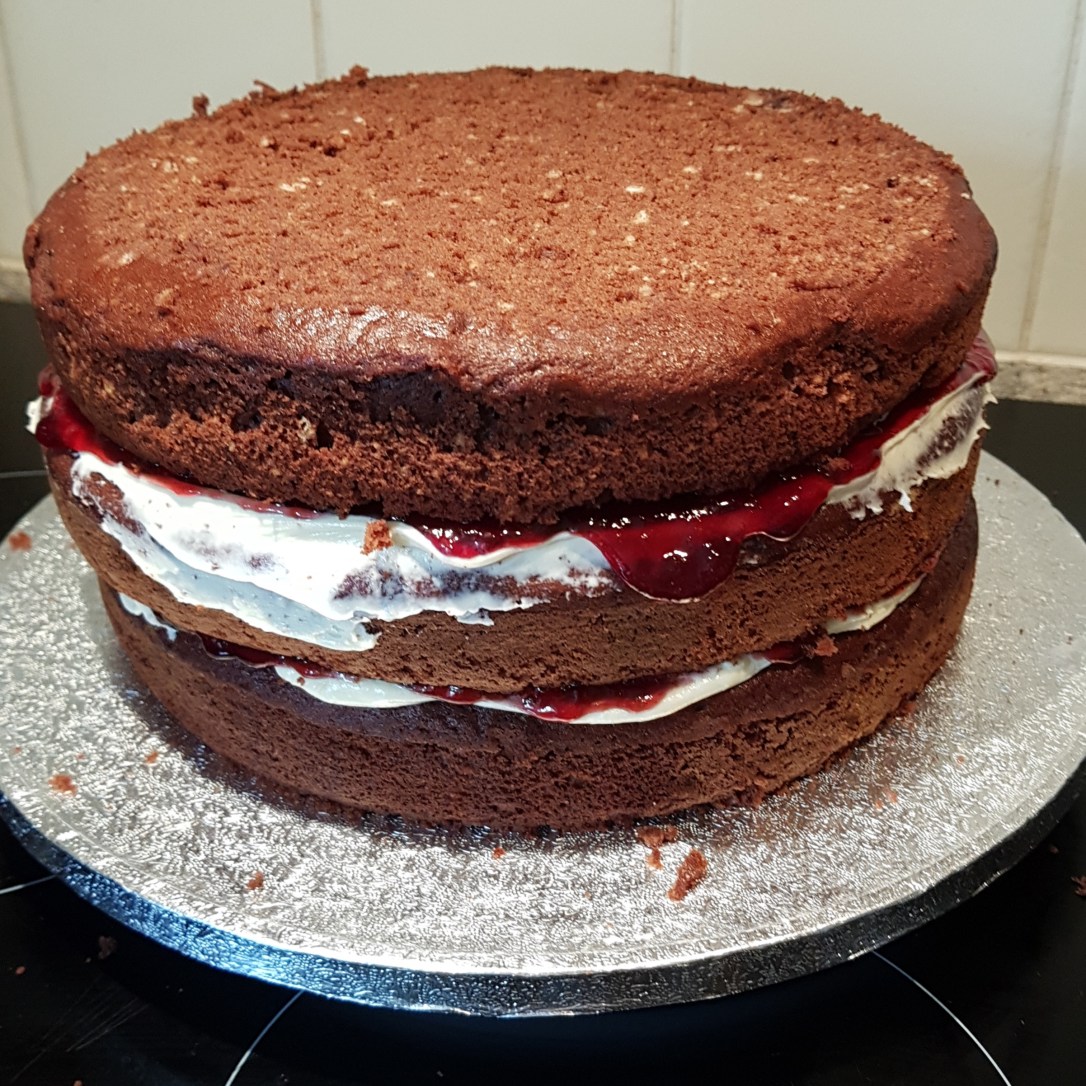
Stack the layers (on a cake board). The first thing you’ll need to do is trim the tops off them – a sharp bread knife will do the job well. I used Betty Crocker Vanilla Buttercream and Hartleys Black Cherry Jam – I covered the sponge first with buttercream then jam. It’s easier to spoon the jam on then spread it around gently with the back of the spoon to avoid mixing the buttercream and jam up too much (I popped the cake back into the fridge between layers but that was just due to the heatwave making the buttercream melt -you won’t usually need to do this!).

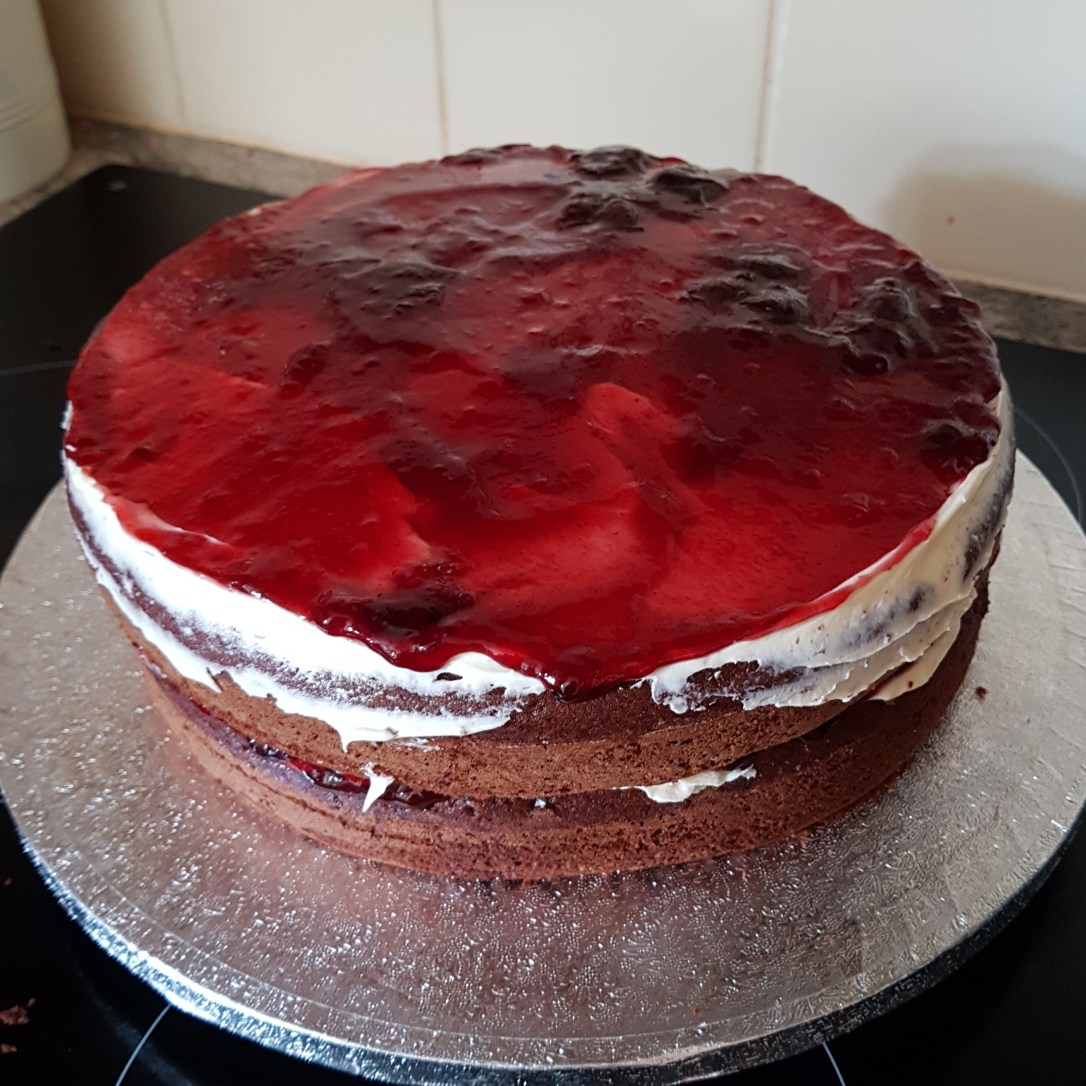
Try not to have them spilling out of the sides as this will get in the way later, though you can scrape off any excess with a palette knife. Once you’ve sandwiched all the layers together, pop it back in the fridge until the buttercream has hardened a bit.

Step three :

Next you need to apply the crumb coat. This is just a thin layer of buttercream that traps all the loose crumbs, helping you get a good finish on your cake. I don’t have a photo of this stage I’m afraid, but the linked video tells you everything you need to know.

Step four :

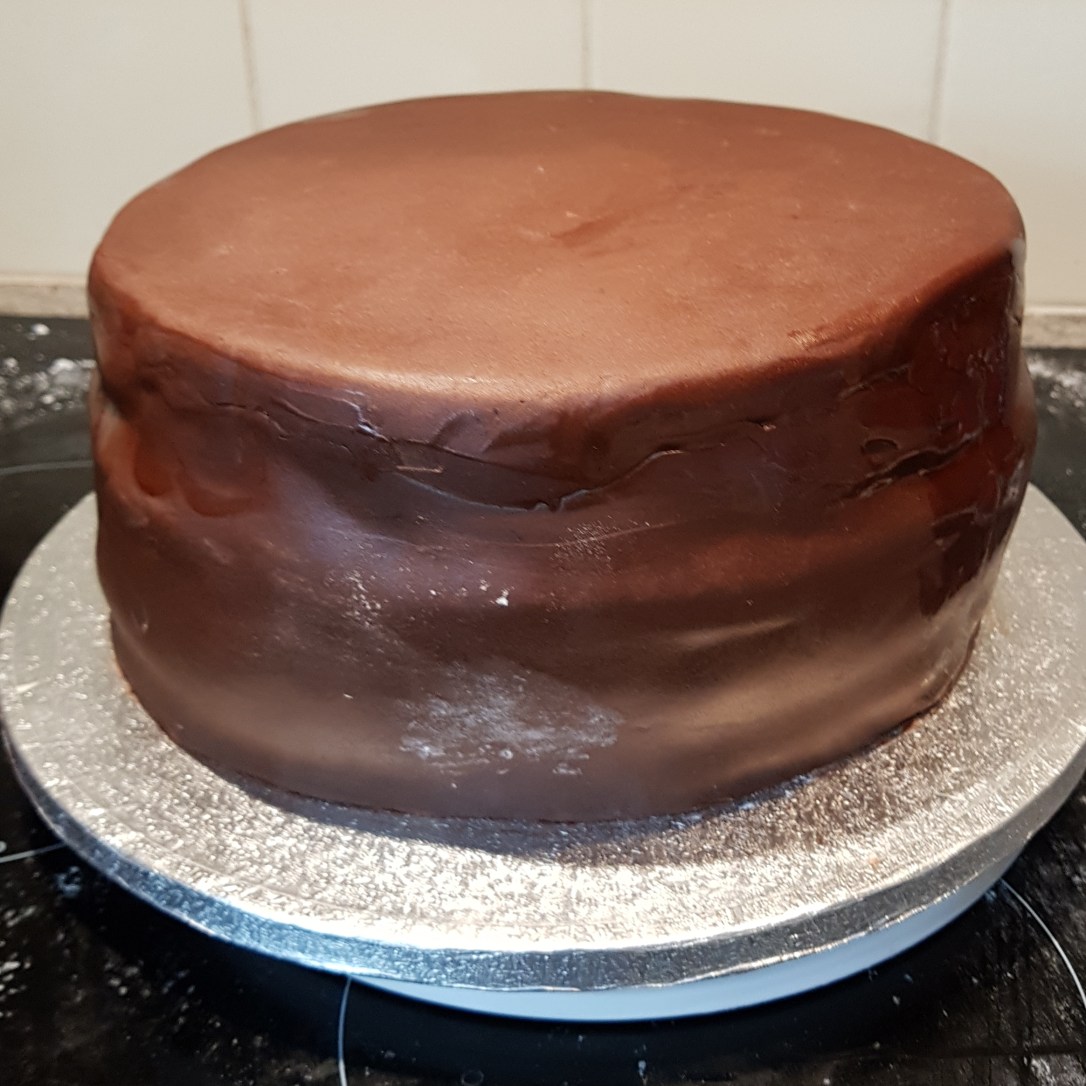
The next stage is where it all went wrong and I nearly threw the whole thing in the bin – covering the cake with chocolate fondant! As you can see, it was impossible to do this bit properly as it was so hot the fondant fell apart every time I lifted it up. I had to stick it on in several pieces and try to blend the edges together with my fingers. As I was doing this, the buttercream inside had melted so much that the middle layer, which had a small crack in it, broke in half completely, with one of the halves trying to make a break for it and causing a bulge in one side. I tried to squish it back into shape then put it back in the fridge in the hope that the shape would set while I thought of a way to rescue the cake. If you want to see how to do it properly, there’s a video here.

Step five:

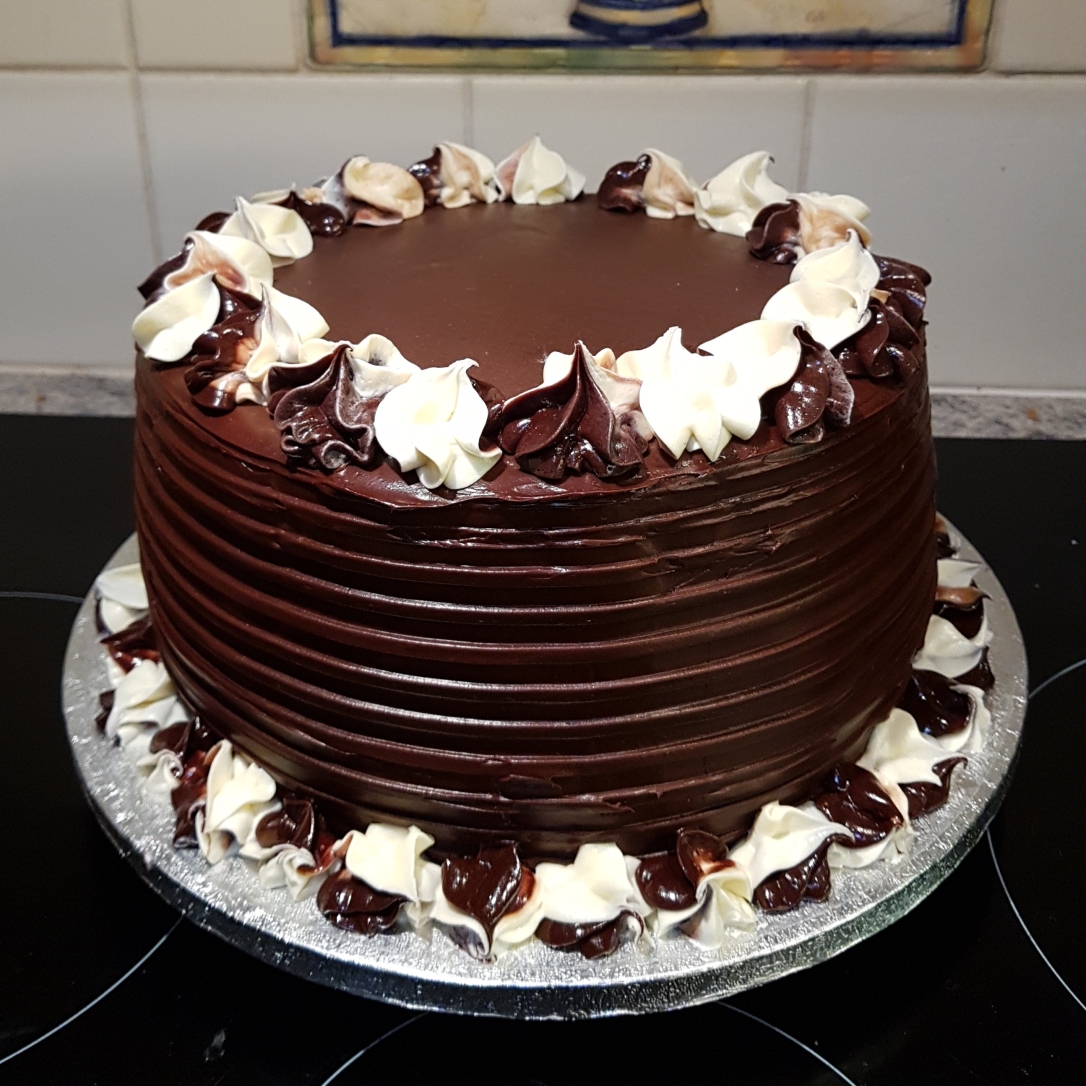
So, I rummaged in my cupboards to see what I had to rescue the cake with. I found partial pots of the frostings I’d used so far, an icing comb, a cake turntable/lazy susan and a 3 colour piping set, and a plan formed! I spread some of the chocolate fudge icing around the sides of the cake with a palette knife, smoothing any of the rough edges along the top edge over on to the top of the cake (they’ll be hidden later). I then used the icing comb and the turntable to create the lines around the sides. Once I was happy with those, I put the cake back in the fridge while assessed what I had left.

Step six:

I had roughly equal amounts of the chocolate and vanilla left so I filled one icing bag with chocolate, one with vanilla and one with half of each. I assembled the 3 colour piping bag using the star nozzle, and piped “blobs” all around the top and the base of the cake. I flipped the bag over between each blob to get the alternating colour effect you can see in the photos. Then – you’ve guessed it! Back to the fridge!

20180721_210413.jpg

Step seven:

It now looked a million times better than it had at the fondant stage but it still needed a bit of something extra to make it special enough for a special birthday. Luckily, I love a biccie so I had a pack of Birthday Party Oreos in the cupboard, and I have a cupcake loving 5 year old so I also have an impressive stash of vegan sprinkles. I stuck them both on the cake and lo, and behold! The finished article!

So, hopefully, this is proof that anyone can make a decent looking cake, even under conditions that are less than ideal! This is only my third cake so if I can do it, any one can! Please don’t be put off by the specialist equipment I have used. I only have it as I inherited it when my mum (who made AMAZING cakes) passed away last year. There are ways around most of it, though if you want to achieve the same effects, you can get most of bits you need quite cheaply online.

If you have any question, please get in touch. In the meantime

Happy Baking!

baking, Cakes, plant based, vegan

Vegan Christmas

In case you didn’t know – Veganuary is just around the corner! We’re all vegan already but it’s always a good time of year for vegans and veggies as there are lots of great recipes and special offers to be found, as well as some great advice for people just starting their vegan journey. This year, I’m planning on making more food from scratch (I say that every year but as I’m “kept woman” nowadays, I have no excuse this year!) but that’s not always possible so I’m going to share our Xmas menu and hopefully show that you can be vegan AND lazy!
First thing to think about ( for me, anyway) is nibbles! There are some ready made mince pies available but as I had my little one at home because of the school holidays we decided to make our own – the easy way – using ready rolled pastry (I actually didn’t even know that was a thing!) and a jar of ready made mincemeat. MiniMe loved it as she got to play with the pastry cutters and icing sugar and I got to control the amount of mincemeat (not a huge fan) so it was a win-win!

Next up were the gingerbread men. Now, we did make them from scratch but the recipe is very easy (and can be found in this book). We did cheat a little with the icing as we bought a tube, but I have no idea how to make vegan icing that’s suitable for decorating gingerbread men, so any tips would be most welcome!

Christmas isn’t complete without a bit of chocolate and what better form than a yule log? I wasn’t sure that my usual vegan sponge recipe would be flexible enough to make into a swiss roll so we haven’t had one since MiniMe’s allergies were diagnosed. Luckily I stumbled upon (i.e, stole!) a genius idea and manged to cobble this together.

It’s made by sticking eight chocolate cupcakes together with chocolate frosting (with a ninth stuck onto the side) then covering the whole thing with what’s left of the frosting. A sprinkle of icing sugar (I actually used this) and a plastic robin and you’re done!
For our Christmas dinner, I handed the kitchen over to my husband, and he did a fabulous job! We started with some cheezly and cranberry bites, then we had a Vbites Celebration Roast with lots of veggies  (including scrummy roast parsnips) and roast potatoes.

We were all a bit full by this point but after a little break we managed a bit of vegan trifle for pudding (recipe can be found on a previous post).

We could barely eating another thing after that so we had slice of yule log for afternoon tea and then gave our tummies a rest! Only until Boxing Day, obviously, when we had more delicious food, but I’ll save that for my next post! For now, I’ll just wish you a Happy and Healthy 2018 and hope that you give Veganuary a try – you won’t regret it!

baking, Cakes, plant based, vegan

Vegan Jaffa Cakes!

So, The Great British Bake Off returned to our screens this week. I absolutely LOVE this show but because we don’t eat meat, eggs or dairy, they very rarely feature anything I can actually make for my family. So imagine my excitement when I read that there was a vegan baker competing this year! Unfortunately, it turns out he’s not vegan at all, but “enjoys vegan baking” so while we may yet see some good recipes, it’s still down to me to veganize everyday treats for my little girl. This week, for the technical challenge, the contestants were asked to make 12 jaffa cakes. Now, to be honest, if you’re not vegan, life is probably too short to make your own, but for those who can’t eat the familiar McVitie’s chocolate coated cakes (and they’re definitely cakes, not biscuits! ) I thought I’d have a go at making some quick and easy ones. I had all this stuff in the kitchen but you will probably need to buy some vegan jelly. I used this one but if you can find ready made orange jelly, all the better – or  – and this may sound a bit blasphemous -you could make a different flavour!

Vegan Jaffa Cakes
makes approx. 24.

Ingredients

Sponge
(This recipe is based on a recipe from this book).

1 cup of soya (or other plant) milk
1 teaspoon of cider vinegar (or lemon / lime juice)
1 1/4 cups plain flour
2 tablespoons of cornflour
3/4 teaspoon baking powder
1/2 teaspoon baking soda
1/2 teaspoon salt
1/3 cup vegetable oil (any mild flavoured one is fine. I use rapeseed but sunflower is also good).
3/4 cup caster sugar
1 1/2 teaspoons vanilla extract

Jelly 
1 sachet of Hartley’s What’s Your Flavour? jelly
2 large oranges.

Chocolate coating
300g vegan dark chocolate

Equipment

2 x 12-hole tart trays
Whisk
Sieve
Pyrex (or other heatproof) jug.
Cooling rack
Medium pyrex bowl
Swiss roll pan / shallow tray.

To make the sponges

  • Grease and flour two 12 hole tart trays. (If you don’t have tart trays, you could use muffin pans and only half fill each hole). 
  • Preheat the oven to 180 C/350 F/ gas mark 4.
  • Whisk together the milk and vinegar in a large bowl and leave to curdle for a few minutes. 
  • Add the oil, sugar and vanilla extract to the milk/vinegar mixture and stir thoroughly.
  • Sift in the all of the dry ingredients and mix until all the large lumps are gone. 
  • Pour into tart trays (each hole will be 1/2 – 3/4 full) and bake for about 15 mins or until a cocktail stick comes out clean.
  • Allow to cool in the tray for 5 – 10 mins then turn out onto a wire cooling rack. 

To make the jelly
  • Add the zest and juice of the oranges* to a large pyrex jug. 
  • Add 1 sachet of jelly crystals and make up to 500ml with boiling water. 

  • Allow flavour to develop for a few mins then pour liquid through a sieve into a non stick tray (or tray lined with cling film). You want the jelly to set about 3mm thick. I used a non stick swiss roll pan. 
  • Chill in the fridge until properly set.
*You could make this even easier by making up the jelly as instructed on the packet, with your favourite orange flavoured cordial/juice. 

Assembling the jaffa cakes. 
  • Once the jelly is set firmly and sponges have fully cooled, use a small cutter to cut 24 jelly discs and place one disc on top of each sponge. 
  • Melt the chocolate – I usually break it up and heat it in short bursts in the microwave. 
  • Let the chocolate cool so that it is still workable but not hot as it will melt the jelly and just slide straight off! If this happens, all is not lost! Just whack that one back in the fridge for a while, until the jelly and chocolate are both cool enough, and try again. 
  • Spread the chocolate over the top of the jelly and sponge – a teaspoon or 2 of chocolate per cake is about right. Take the chocolate right to the edges of the sponge with the back of the spoon. 
  • While the chocolate is still wet, make a criss cross pattern on the top of each cake with a cocktail stick. 
  • Allow to cool. 
Thanks for visiting my blog! If you like this recipe, you might also enjoy this!